Self Hosting my blog - Part 1
Moving my blog from Google blogger to Hugo on AWS
So, after a long time and a very little deliberation, I finally decided to stop using Google Blogger and move to a “self-hosted” soultion. The idea was to setup most of the things from scratch and have much more control over my own blog. So, I decided to give “static site generators” a try. I looked at a few different static site generators and in the end decided to go with Hugo, because it was version controlled, fast, secure, easy to understand and had good flexibilty in terms its functionality (not to mention a lot of themes to go with it). It didn’t take me long to get myself up and running with Hugo. I also decided to use Future Imperfect theme for my blog.
Initial work was pretty easy, moving all the existing posts into markdown files and understanding how the internals of Hugo and the theme I was using worked. I edited all the required settings and checked the site locally, it was working fine. Now came the major task, making it public!
First, I needed a domain. I had already decided a domain to buy (this one), now all I needed was to find a cheap provider. After searching for quite a while, I finally found a good deal on Hostinger for the domain name. They were also providing hosting services, but I had my mind set on using AWS. So, I bought a domain name only.
Second, I needed a server to actually host my blog on. I intially used an AWS on-demand instance during my free trial, and now the trial being expired, I was paying for the instance monthly, which was just sitting idle. I decided to minimize the cost as much as possible, so I decided to use spot instances instead.
Now spot instances come with their very own set of problems, namely no commitment from AWS. The spot instance can be terminated at any time by AWS (when EC2 needs capacity back, though that happens rarely). I needed to make sure my entire setup was stateless. Also, I simply couldn’t point my domain to an IP, because the instance (and hence the IP) could go down any time. Elastic IP was no help either, as I would have to manually associate it to the instance everytime a new instance spawned (p.s. this wouldnt even work in high load, multi instance scenario), and finally an ALB (application load balancer) couldn’t be directly added as an A record at my domain as the A record needs to be an IP. All the signs point towards using Route 53.
Let’s see how we can make this work.
So let’s back up for a moment and plot things needed to be done. We:
- need to have a spot instance/fleet with the actual blog.
- need a static address to this/these instances.
- need to point actual domain name to this address.
So, to get things on the way, we need to create an application load balancer first, which will act as … well, a load balancer, but more importantly will always provide access (to selected ports) to the instances in its target group. Creation is pretty straight-forward and we add no targets to the target group, as we will let the spot fleet add/remove instances from this target group. Also, we’ll perform SSL termination here instead of doing it at the server, as AWS also provides a nifty little feature to support that and make our life easier. We request a SSL Certificate for our website through ACM and it provides us a challenge to prove that we own the domain. If we choose DNS, it’ll provide us with a CNAME entry that we need to add to our domain with the domain registrar. Once done, the cert will be active in some time.
Note
Make sure to add AWS CAA(s) records to your domain, otherwise you will fail the validation process.
Once this is done, we now create a Spot fleet.
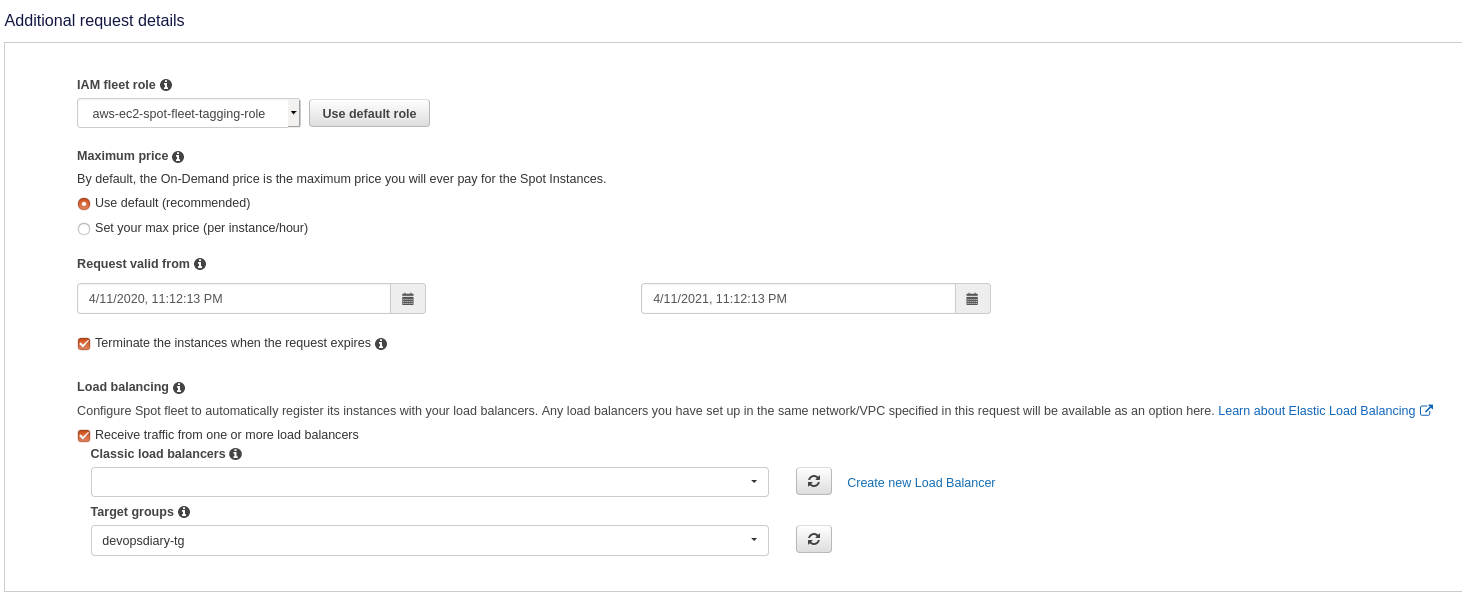
We goto “Request Spot Instances” on the EC2 dashboard and then are greeted with the launch wizard. We can select workload here based on our use-case, and so we select Load balancing workload. We then select the AMI, minimum compute units and a key-pair for accessing the instances. We can also optionally choose a “Max. target cost for spot”, so that we never pay beyond that maximum selected price. We can then select the instances we want in our fleet.
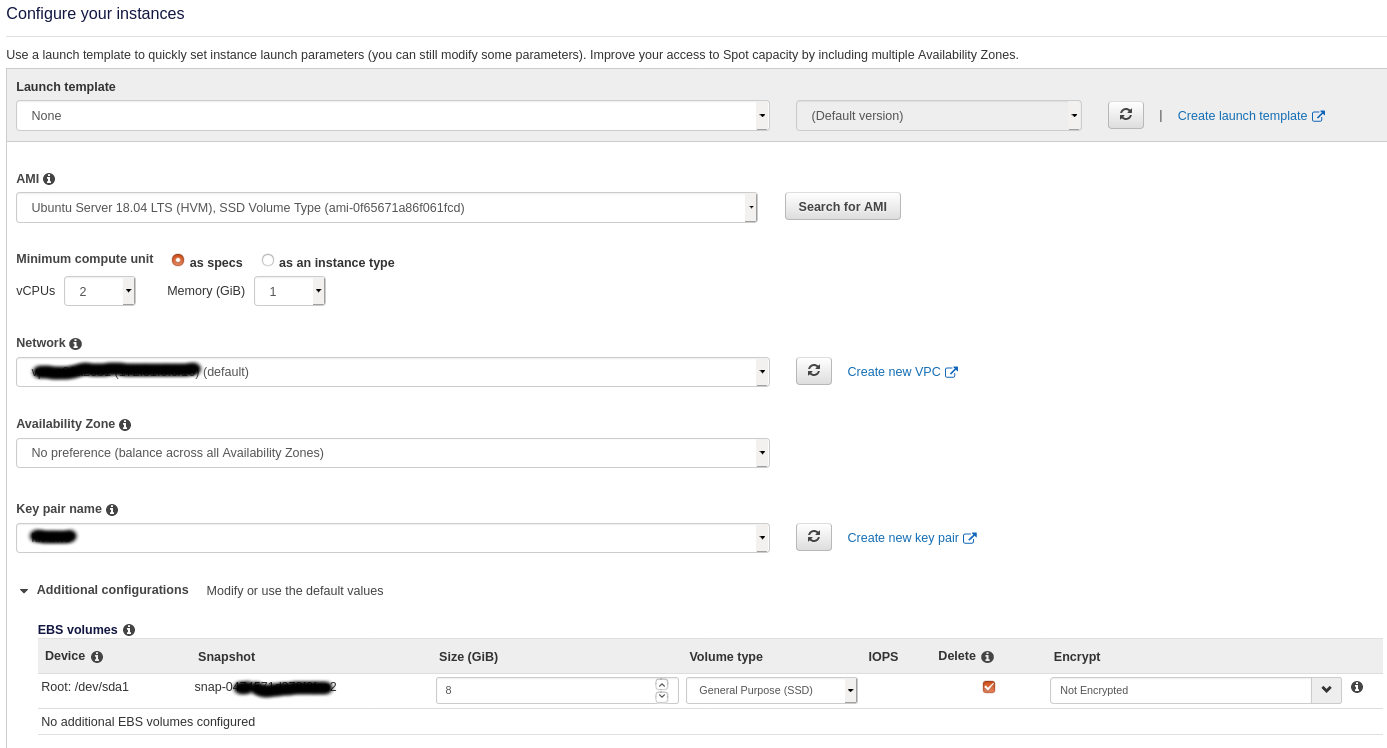
The last thing we need to do is make sure the instances are automatically added to the target group we created earlier (with the load-balancer). For that, we need to first uncheck the “Apply defaults” checkbox in Additional request details and then we are presented with the load balancing options. Select you target group here.
Once done, we’ll see a new instance(s) spawn based on whatever capacity we required. The first part is now done, and we can reach our server(s) using the load balancer address. But we still can’t use this address to have it directly pointed by our actual domain.
Enter, Route 53.
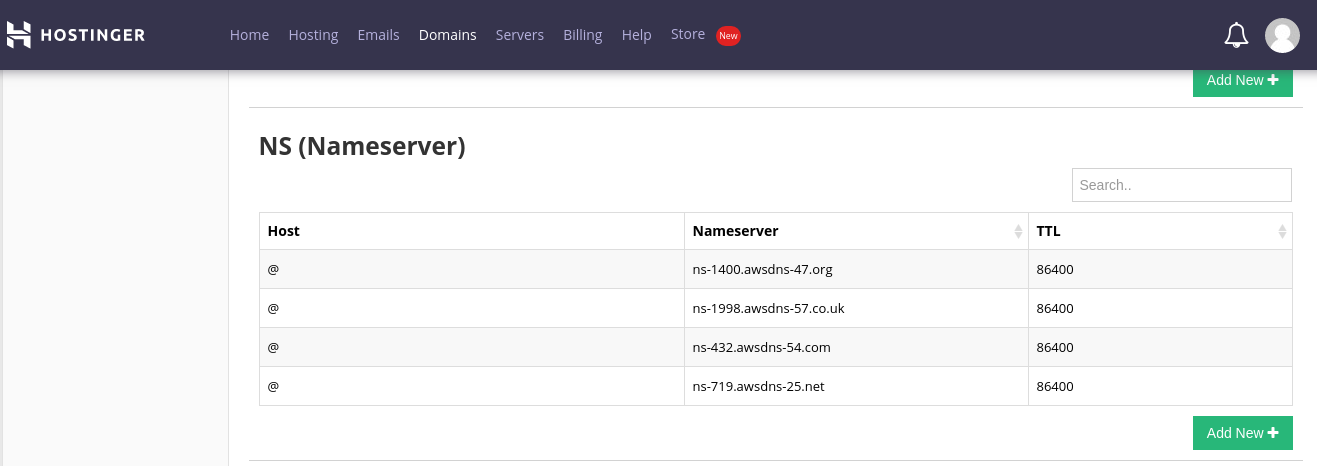
Route 53 is Amazon’s own DNS service. Route 53 can enable us to set the A record as the alb we set up earlier. We need to create a new “Publically Hosted Zone” for our domain. Once we have created a zone, we can update the nameservers with our domain registrar which are provided in our hosted zone.

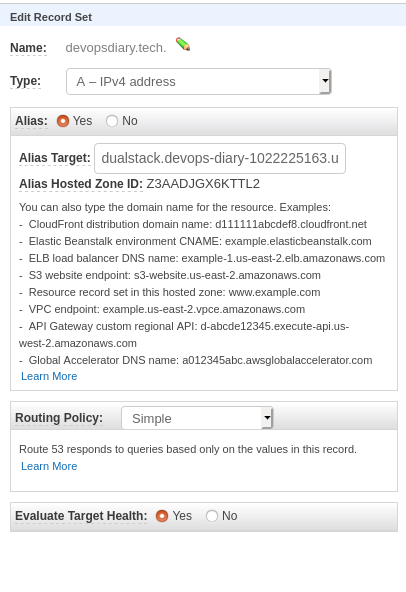
Once done, we finally add records to our Hosted Zone. First we create an A record with the alb address we created in the previous step (Set Alias to “Yes”). We also create a CNAME record for www.devopsdiary.tech so that the www domain also resolves to the same site.
It can take upto 48 hours for the nameserver changes to fully reflect(really depends on what ttl was set for the records), and once done, you’ll be able to access your hosted site through your domain name.
This concludes Part-I for for self-hosting our blog. Next time, we actually deploy our version controlled blog to the spot instance(s) and have our blog up and running!
Share this post
Twitter
Facebook
Reddit
LinkedIn
Email